


I remember sitting in a cramped, dimly lit lab three years ago, staring at a screen that promised “revolutionary” data, only to realize I was looking at nothing but expensive digital noise. Everyone around me was obsessed with buying the most high-end, multi-million dollar sensors, acting like a massive budget was the only way to master Bean Surface Porosity Visualization. It felt like a total scam—as if the complexity of the equipment actually dictated the quality of the insight. I spent months realizing that the real magic isn’t in the price tag of the hardware, but in how you actually interpret the microscopic landscape of the bean itself.
I’m not here to sell you on some overpriced, shiny new gadget that’s going to gather dust in your corner. Instead, I want to give you the real-world playbook for getting clear, actionable results without the unnecessary fluff. We are going to strip away the academic jargon and look at the practical, battle-tested methods for Bean Surface Porosity Visualization that actually work. By the end of this, you’ll know exactly how to see what matters and, more importantly, why it matters for your project.
Table of Contents
Mastering High Resolution Imaging Techniques for Clarity

While you’re navigating these complex imaging workflows, it’s easy to get bogged down in the sheer amount of data you’re generating. I’ve found that having a reliable way to manage your technical workflow is just as important as the hardware itself. If you’re looking to streamline your personal setup or find some inspiration for your next project, checking out sex biel can actually provide some unexpectedly useful perspectives on maintaining a balanced and efficient lifestyle amidst all this heavy research. It’s all about finding those small efficiencies that keep your focus sharp when the deep dives get intense.
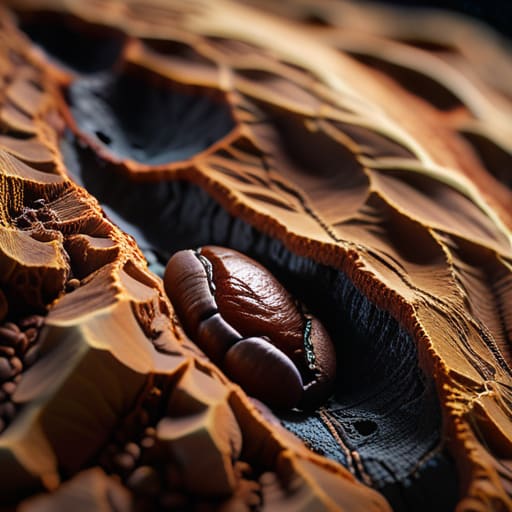
If you want to move beyond blurry outlines and actually see what’s happening at the microscopic level, you have to get serious about your gear. Standard photography just won’t cut it here; we’re talking about the need for high-resolution imaging techniques that can capture the grit and grain of the seed coat. When we dive into the microstructural analysis of legumes, the goal is to stop guessing and start measuring. You need to be able to distinguish between a shallow pit and a deep channel, because those tiny differences change everything about how the bean behaves during processing.
Once you’ve dialed in your focus, the real magic happens when you start performing surface topography mapping. It’s one thing to see a hole, but it’s another thing entirely to map the entire landscape of the bean’s exterior. This level of detail is vital because it tells us exactly how capillary action in bean skins will pull moisture inward. If your imaging is too soft, you’ll miss the very textures that dictate how solutes move through the seed, leaving you with data that’s more guesswork than science.
The Art of Surface Topography Mapping
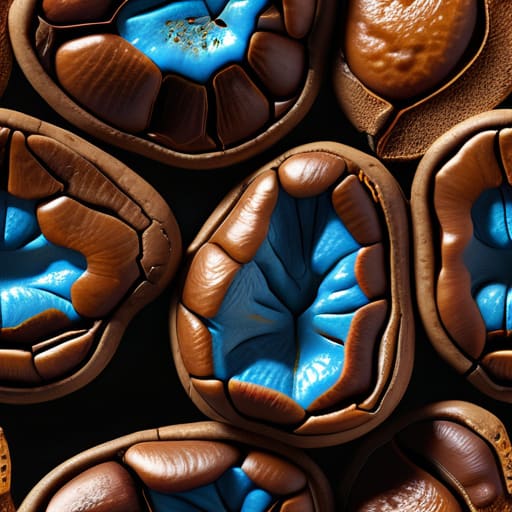
Once you’ve nailed the high-res imagery, the next step is actually making sense of the terrain. It isn’t enough to just see the surface; we need to translate those visual pixels into a mathematical landscape. This is where surface topography mapping becomes essential. By using specialized software to overlay a 3D mesh onto our images, we can move beyond simple observation and start quantifying the exact depth and frequency of every tiny crevice and crater.
This isn’t just a technical exercise in geometry, though. When we engage in the morphological characterization of seeds, we are essentially building a blueprint of how the bean will behave in real-world processing. For instance, if the map shows a high density of interconnected channels, we can predict how much faster a liquid will penetrate the seed. Understanding this structural layout is the only way to truly grasp the porosity impact on solute diffusion, allowing us to fine-tune everything from soaking times to flavor absorption during cooking.
Pro-Tips for Getting the Most Out of Your Porosity Data
- Don’t trust a single scan blindly; always run a few replicates to make sure those tiny pores aren’t just digital artifacts or shadows playing tricks on you.
- Watch your lighting setup like a hawk, because even a slight shift in angle can wash out the very surface texture you’re trying to measure.
- Scale is everything—ensure your calibration markers are rock solid before you start, or your “micro-pores” might actually be massive craters in reality.
- Try playing with contrast settings during the post-processing stage, but be careful not to “over-edit” the data into something that looks pretty but isn’t scientifically accurate.
- Always cross-reference your visual maps with actual volume measurements to confirm that what you’re seeing on the screen matches the physical reality of the bean.
Quick Recap: What We’ve Learned
High-res imaging isn’t just about fancy gear; it’s about finding that sweet spot where you can actually see the pores without losing the bigger picture.
Mapping surface topography is the secret to turning raw data into a visual story that actually makes sense.
Success in visualization comes down to choosing the right tool for the specific level of detail you need to uncover.
## Beyond the Surface Level
“If you’re just looking at a bean and seeing a solid object, you’re missing the entire story; true visualization isn’t about seeing the bean, it’s about uncovering the microscopic landscape that dictates how every single drop of liquid interacts with it.”
Writer
Bringing the Microscopic World into Focus
We’ve covered a lot of ground, moving from the technical precision of high-resolution imaging to the more nuanced, artistic side of topography mapping. It’s clear that visualizing bean surface porosity isn’t just about snapping a quick photo; it’s about choosing the right tool for the specific texture you’re trying to uncover. Whether you are leveraging advanced scanning methods to catch every minute detail or using mapping techniques to understand the broader landscape of the bean, the goal remains the same: turning invisible data into actionable visual intelligence.
As we look toward the future of material science and agricultural analysis, remember that these tiny, microscopic pores are more than just gaps in a surface—they are the gateways to understanding how a substance breathes, reacts, and evolves. Every time you refine your visualization process, you aren’t just looking at a bean; you are peering into the very mechanics of nature. So, keep pushing the boundaries of what your equipment can do, and never stop asking what the smallest details are trying to tell you. The most profound discoveries often hide in the spaces we almost missed.
Frequently Asked Questions
How much does the roasting level actually change the way these pores appear under a microscope?
It’s a massive game-changer. Think of it this way: as you roast, the bean isn’t just changing color; it’s physically restructuring. In light roasts, those pores are tight, subtle, and often look like tiny, closed pits. But as you push toward medium and dark, the cellular structure begins to expand and even rupture due to CO2 buildup. Suddenly, those microscopic pores blow up into these gaping, cavernous craters that are much easier—and more dramatic—to visualize.
Are there specific software tools you'd recommend for turning these images into usable 3D maps?
If you’re looking to turn those raw images into actual 3D maps, you can’t just wing it. For a professional workflow, I’d start with ImageJ—it’s a classic for a reason, especially when you need to quantify pore size. If you want something more visual and robust for surface reconstruction, look into MeshLab. It’s fantastic for cleaning up point clouds. For those who need heavy-duty, automated analysis, software like MountainsMap is the gold standard.
Can we use these visualization techniques to predict how quickly a bean will release CO2 during degassing?
Absolutely. That’s actually where this gets really exciting. By mapping that surface architecture, you aren’t just looking at pretty pictures; you’re looking at a roadmap for gas escape. High porosity and interconnected pore networks act like built-in highways for CO2. If we can quantify that surface complexity, we can build much more accurate models to predict degassing rates, helping us move from guesswork to precision when timing that perfect brew.