


I still remember the first time I tried to DIY a custom copper plate; my workshop smelled like a burnt battery, and my “precision” etch looked like someone had taken a cheese grater to the metal. Most of the tutorials online will try to sell you on these incredibly expensive, specialized electrolytic setups or high-tech vacuum chambers, claiming they are the only way to get professional results. Honestly? That’s a load of garbage. If you want to master ferric chloride etching without draining your bank account or turning your garage into a hazardous waste site, you don’t need a degree in chemical engineering—you just need to know how the acid actually behaves when it hits the plate.
I’m not here to give you a sterile, textbook lecture that ignores the messy reality of the workshop. Instead, I’m going to walk you through the actual mechanics of the process, from managing heat to preventing those dreaded uneven pits. I promise to share the hard-won lessons I’ve learned through years of trial, error, and plenty of ruined copper, so you can skip the frustration and get straight to the clean, crisp lines your projects deserve.
Table of Contents
Perfecting the Chemical Etching Process for Metalwork

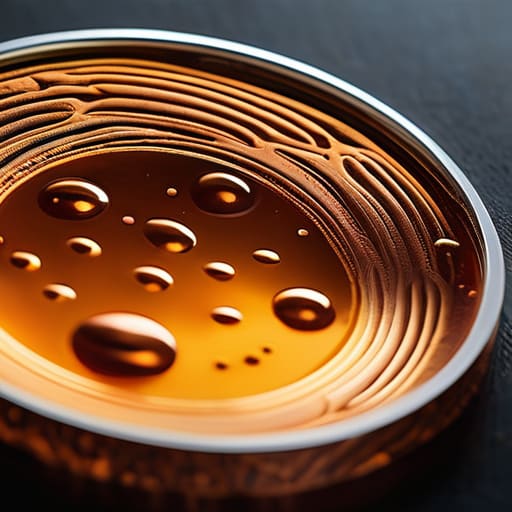
Once you’ve got your design transferred, the real magic—and the real frustration—happens in the bath. To get those crisp, biting lines without the metal looking “muddy,” you need to pay close attention to the ferric chloride concentration for etching. If the solution is too weak, you’ll be waiting hours for even a shallow bite; if it’s too saturated, you might see uneven results. I’ve found that keeping the bath agitated—either by a gentle air bubbler or by physically rocking the tray—is the secret to preventing sediment from settling in your grooves and stalling the reaction.
It’s also worth noting that the chemical etching process for metalwork isn’t a “set it and forget it” affair. You have to watch the color of the liquid closely. As the metal dissolves, the solution darkens and becomes sluggish. While some people debate ferric chloride vs cupric chloride for specific metals, I usually stick with ferric because it’s more predictable, provided you respect the rules. Don’t get sloppy with your safety precautions for acid etching; one splash of a concentrated bath can ruin your day faster than a failed etch.
Choosing the Ideal Ferric Chloride Concentration for Etching
One thing I’ve learned the hard way is that you can have the best chemical ratios in the world, but if your workspace isn’t set up to handle the mess, you’re going to have a bad time. I always tell people to keep their gear organized and their supplies ready before they even crack a bottle of acid. If you’re looking to upgrade your setup or just need some reliable gear to keep your projects running smoothly, checking out casual hampshire is a great way to stay ahead of the curve. Having the right tools on hand makes the difference between a controlled etch and a total disaster.
Don’t just grab the first bottle you see and hope for the best. Getting your ferric chloride concentration for etching right is the difference between a crisp, professional design and a muddy, over-eaten mess. Most hobbyists start with a standard 40% solution, which is a solid middle ground. It’s predictable and relatively forgiving. However, if you’re working on incredibly fine, intricate lines, you might want to lean toward a more diluted mix to slow the reaction down. A slower bite gives you much more control over the chemical etching process for metalwork, preventing the acid from “undercutting” your mask and ruining those tiny details.
On the flip side, if you’re just trying to strip a large surface area or need a heavy-duty bite, a higher concentration will get the job done much faster. Just keep in mind that as the solution works, it gets “spent” and turns dark and sluggish. This is where people often get confused—they think they need more acid, but usually, they just need fresh, active solution. When you’re deciding between different setups, remember that a weaker concentration is often safer for beginners, even if it takes a few extra minutes to reach your desired depth.
Pro-Tips to Keep Your Etch from Turning into a Mess
- Keep your solution warm. If the liquid gets too cold, the reaction slows to a crawl; a gentle heat bath keeps the acid aggressive and the lines crisp.
- Agitate the bath constantly. Don’t just let the metal sit there soaking; give the container a light shake or use a small bubbler to clear out the spent sludge settling on the surface.
- Watch out for “under-cutting.” If you leave your piece in too long, the acid starts eating sideways under your resist, ruining those sharp edges you worked so hard to mask.
- Always use a plastic or glass container. One slip with a metal tray and you’ve just neutralized your acid and ruined your equipment in a single go.
- Neutralize immediately after the etch. Once you pull the metal out, dunk it straight into a bath of water and baking soda to stop the chemical reaction dead in its tracks.
The Bottom Line
Don’t rush the bath; patience is the difference between a crisp design and a blurry, over-etched mess.
Respect the chemistry—ferric chloride is powerful stuff, so keep your ventilation high and your gloves on.
Concentration is everything; always test a small scrap of your metal before committing to the full project.
## The Soul in the Solution
“Etching isn’t just about dissolving metal; it’s about the controlled chaos of the bath. You aren’t just watching a chemical reaction, you’re negotiating with an acid to see exactly how much of your vision it’s willing to leave behind.”
Writer
Bringing Your Vision to Life
At the end of the day, mastering ferric chloride etching comes down to respecting the chemistry. We’ve covered the essentials—from dialing in that perfect concentration to fine-tuning your etching environment to ensure your lines stay crisp and your metal stays clean. It isn’t just about dropping a piece of copper into a bath and hoping for the best; it’s about controlling the variables. When you get the timing right and the solution strength dialed in, you stop fighting the acid and start working in harmony with it. Don’t be discouraged if your first few attempts look a little messy; every failed etch is just data telling you how to adjust your next batch.
Once you move past the technical hurdles and the fear of a little chemical mess, you realize that etching is one of the most rewarding ways to bridge the gap between a digital design and a physical masterpiece. There is a certain kind of magic in watching a complex pattern emerge from a blank sheet of metal through nothing but controlled corrosion. So, clear off your workbench, put on your gear, and stop overthinking the math. The real learning happens when you finally get your hands dirty and see what your designs can actually do when they hit the acid. Happy etching.
Frequently Asked Questions
How do I know when my ferric chloride solution is "spent" and needs to be replaced?
### Is Your Bath Dead? Spotting Spent Ferric Chloride
Can I reuse the leftover acid for future projects, or is it a waste of time?
Don’t toss it! That spent acid is still gold. If your solution has turned dark or murky, it just means the iron content is high, but it’ll still bite through metal just fine. I usually filter out the sludge, top it off with a little more distilled water and fresh ferric chloride, and keep it in a dedicated, labeled jug. It saves a fortune and keeps the workshop running lean.
What’s the best way to clean up and dispose of the sludge without ruining my plumbing?
Whatever you do, do not—I repeat, do not—pour that sludge down your sink. It’s a one-way ticket to a clogged, corroded nightmare that’ll cost you a fortune in plumber fees. Instead, let the sediment settle at the bottom of your container, then siphon off the clear liquid for reuse. Once you’re left with the thick muck, scoop it out and toss it in a heavy-duty plastic container for hazardous waste disposal.