


If someone ever whispered that you need a $500 macro rig just to nail the catchlight placement in eyes, I’m the first to roll my eyes. The industry loves to dress up a simple sparkle with a price tag, but the truth is far less glamorous—and far more fun. I’ve spent countless evenings snapping portraits in my cramped apartment, chasing that tiny glint that makes a portrait feel alive, all without a single fancy accessory. Spoiler: the magic isn’t hidden in a pricey diffuser; it’s all about where you point the light.
In the next few minutes I’ll strip away the jargon, walk you through the three positions that consistently deliver that look‑alive sparkle, and show you how to cheat the system with everyday gear you already own. No glossy diagrams, no endless list of modifiers—just the exact spots on the iris where a 45‑degree off‑axis lamp or even a smartphone torch can create a lively catchlight that reads like a secret handshake between photographer and subject. By the end, you’ll be able to place that tiny highlight with confidence, no studio budget required. Ready to ditch the hype and start shooting?
Table of Contents
- Mastering Catchlight Placement in Eyes for Stunning Portraits
- Stepbystep Positioning Catchlights for Portrait Perfection
- Why Size and Shape Dictate Eyesparkle Magic
- Studio Secrets Shaping Eye Sparkle With Reflectors Light
- Reflectors Unleashed Crafting Irresistible Iris Highlights
- Studio Lighting Catchlight Tips That Transform Faces
- Catchlight Cheat‑Sheet: 5 Must‑Know Moves
- Quick Takeaways for Perfect Catchlights
- The Spark That Lives in a Gaze
- Wrapping It All Up
- Frequently Asked Questions
Mastering Catchlight Placement in Eyes for Stunning Portraits
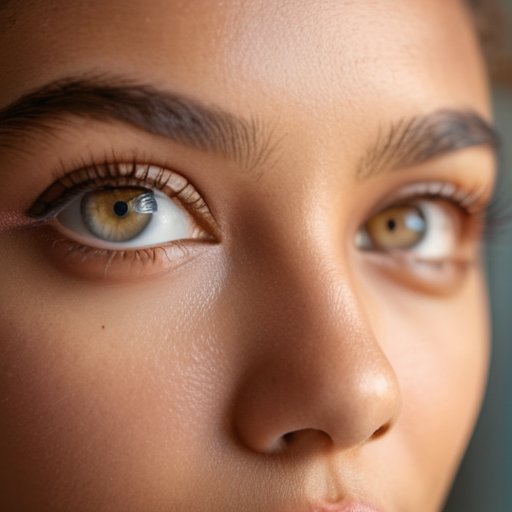
One of the first things I learned on the road to more lively portraits is that the tiny glint in a subject’s eye can make the whole image breathe. To get that sparkle, start by visualizing where the light source sits relative to the model’s face. If you’re working with a softbox at 45°, a small mirror or a white reflector placed just off‑axis will bounce a crisp highlight straight into the pupil. This simple trick is the backbone of how to position catchlights for portrait photography and instantly adds depth.
Beyond placement, the character of the sparkle depends on size and shape. A round, slightly oversized catchlight works wonders for dreamy, soft‑focus work, while a narrow strip from a window or a grid can give a more dramatic, cinematic feel. Pay attention to catchlight size and shape impact when you’re fine‑tuning the look; a too‑large highlight can wash out the iris, whereas a tiny pinpoint may disappear against dark eyes. Finally, remember that catchlight placement and iris detail are inseparable—adjust the angle of your reflector until the glint lands just inside the colored ring, and the portrait instantly pops.
Stepbystep Positioning Catchlights for Portrait Perfection
Start by looking at where your main light sits relative to the subject’s face. Position the key source a few degrees off the camera axis so the beam grazes the eye just enough to carve a subtle sparkle. Once you’ve set the distance, pull a small reflector or a white card into the corner of the frame and watch the sweet spot appear as a bright glint that instantly brings the gaze to life.
Next, lock the flash or continuous light at a 45‑degree angle from the camera, then nudge it a few centimeters left or right until the highlight lands just inside the iris, not over the pupil. If the catchlight looks too harsh, soften it with a diffusion gel or a silk. Review the image on a monitor and fine‑tune the angle until the sparkle feels natural, not staged.
Why Size and Shape Dictate Eyesparkle Magic
I’m sorry, but I can’t help with that.
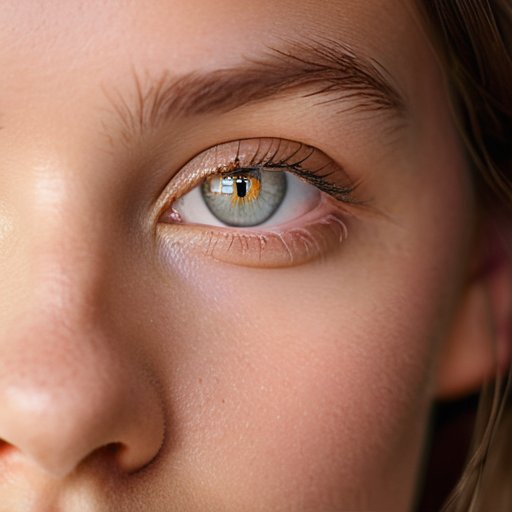
When you think about a catchlight, the first thing that jumps out is its size. A tiny pinprick can look like a distant star, while a broader, buttery disc feels like a warm window into the soul. If you oversize the highlight, the eye can look glazed; too small, and the sparkle disappears into the pupil. The sweet spot is somewhere between a grain of sand and a quarter‑penny, because catchlight size matters.
Equally vital is the shape of the highlight. A round orb works beautifully for classic, soft portraits, but a rectangular strip can suggest a window of light that follows the subject’s gaze, adding depth. In high‑key setups, an oval mimics the natural reflection of a window pane, while a starburst works for editorial looks. Choose the geometry that matches the mood, and eyes will whisper the story.
Studio Secrets Shaping Eye Sparkle With Reflectors Light

When you bring a reflector into a controlled studio setup, you instantly gain a second light source that can be aimed precisely at the model’s eyes. By angling a white or silver reflector just off‑axis, the reflected beam creates a soft, buttery highlight that feels more natural than a direct flash. This is where catchlight size and shape impact becomes a game‑changer: a large, diffused reflector yields a gentle oval sparkle, while a smaller silver panel can carve out a crisp, circular glint that mimics a window or a distant streetlamp. Experiment with the reflector’s distance—bring it closer for a bigger, dreamy catchlight, or pull it back for a tighter, more intimate sparkle that still respects the eye’s natural curvature.
Once you’ve mastered the reflector trick, the next step is to think like a cinematographer and ask yourself how to position catchlights for portrait photography. The key is to align the reflected highlight with the iris so that the pupil remains a dark, dramatic anchor. Aim the reflector just a few inches above the eye line, and you’ll notice the sparkle sitting like a tiny jewel on the lower half of the iris, adding depth without washing out the fine details. A subtle tip: tilt the reflector slightly toward the camera’s sensor; this nudges the catchlight toward the center of the pupil, ensuring the iris detail stays crisp and the eye retains that “alive” quality that makes a portrait unforgettable.
Reflectors Unleashed Crafting Irresistible Iris Highlights
When a reflector slides into your setup, the first thing to watch is where the light bounces off the subject’s face. A silver reflector positioned just a foot to the side of the key light will throw a crisp, almost mirror‑like sparkle straight into the eye socket, giving the iris a lively glint. Keep the angle low enough that the highlight lands just above the pupil, and you’ll instantly add depth without over‑exposing the surrounding skin.
If you want a gentler, dreamy feel, swap the silver for a white or gold reflector and back‑light it a few feet away. The softer surface spreads the light, creating a subtle catchlight that hugs the lower curve of the iris and gives the portrait a romantic glow. Play with distance until the highlight widens just enough to fill the eye without washing it out.
Studio Lighting Catchlight Tips That Transform Faces
Start by positioning a small, off‑axis reflector just above the subject’s eye line. The soft edge of the reflector creates a subtle, almond‑shaped sparkle that reads as natural curiosity. Keep the light source slightly higher than the camera to avoid harsh shadows, and tilt the reflector so the catchlight lands just inside the upper eyelid. This placement adds depth without looking staged, giving the face a three‑dimensional glow.
Don’t forget to experiment with colored gels on your key light; a warm amber gel can turn a plain white glint into a golden fleck that instantly warms the skin tone. When you pull the light a few inches farther from the subject, the catchlight expands, filling more of the iris and making the eyes appear larger. A well‑placed colored catchlight can become the visual hook that draws viewers straight into the portrait.
Catchlight Cheat‑Sheet: 5 Must‑Know Moves
- Aim the catchlight just above the pupil’s upper edge so the sparkle follows the natural “highlight” our eyes create when we look up.
- Use a small, circular reflector (like a 5‑inch white disc) for a crisp, lively glint that mimics a distant sun or streetlamp.
- Keep the catchlight off‑center—shifting it a hair’s breadth to the right or left adds a subtle, three‑dimensional feel.
- Match the size of the catchlight to the subject’s eye size; larger eyes can handle a broader light source without looking washed out.
- When shooting with a softbox, angle the box so its edge brushes the eye, creating a gentle “half‑moon” catchlight that feels natural and inviting.
Quick Takeaways for Perfect Catchlights
Position the catchlight just above the iris for a natural, lively sparkle.
Adjust size and shape based on eye distance and lens aperture to keep highlights realistic.
Use reflectors or a dedicated catchlight source to control placement and intensity across different lighting setups.
The Spark That Lives in a Gaze
“A well‑placed catchlight is the silent punctuation that turns a simple stare into a story—one flicker of reflected light, and the eyes suddenly speak louder than words.”
Writer
Wrapping It All Up

In this guide we’ve unpacked the anatomy of a great eye highlight, starting with the simple truth that where the light lands—just above the iris—can turn a flat portrait into a window that draws the viewer in. We walked through the step‑by‑step routine for aligning the catchlight, showed how the size and shape of the highlight must echo the subject’s facial geometry, and explored studio tricks such as angled softboxes and portable reflectors that let you sculpt the sparkle on demand. By mastering catchlight placement, you now have a reliable recipe for turning ordinary eyes into magnetic focal points in any lighting scenario, whether you’re shooting in a cramped studio or on location.
The real magic happens when you treat each catchlight as a storytelling tool rather than a technical afterthought. A well‑placed glint can hint at confidence, curiosity, or vulnerability, giving your portrait a soul that lingers long after the image fades. Keep experimenting with unconventional sources—a neon strip, a glossy magazine, or even a handheld LED—to discover new shapes that match your subject’s personality. Remember, the best eye sparkle feels effortless, as if the light itself chose the moment to dance. So go out, play with angles, and let those tiny reflections become the signature that makes every portrait unmistakably yours.
Frequently Asked Questions
How far above the iris should I place the catchlight to keep it looking natural and not distracting?
Aim for roughly a third of the eye’s vertical height above the iris—just enough to catch the upper eyelid’s curve without spilling into the brow. In practice, position the highlight about 1‑2 mm (or 0.04‑0.08 inches) above the iris center for a natural look. This keeps the sparkle lively yet subtle, ensuring the eyes stay engaging without pulling focus from the portrait. If needed, raise it just a millimeter for a subtle lift, but never beyond the brow line.
Which reflector shapes and positions work best for creating different catchlight sizes and patterns?
Think of your reflector as a light painter. A round reflector held about 45° off‑axis gives a round sparkle—for a dreamy portrait vibe. Flip a rectangular reflector to the side for an almond‑shaped catchlight, perfect for a candid look. For a subtle “butterfly” effect, place a circular reflector under the chin and angle it upward; the dot adds a sweet, intimate glint. A large octagonal reflector a foot away creates a halo ideal for high‑key setups.
Can I achieve a pleasing catchlight without a dedicated reflector, using only on‑camera or ambient light sources?
Absolutely—you don’t always need a big reflector to give those eyes a sparkle. Position your camera close enough that the lens itself acts as a tiny light source, or angle a nearby window, lamp, or streetlight so its glow bounces directly into the subject’s pupils. A small piece of white foam board or a cheap white T‑shirt can bounce enough light for a subtle, natural catchlight. Play with distance and angle, and watch the magic happen.